

Paying with NectarPay — Step 2: The Wallet You'll Need
Which wallet to use with NectarPay, the wallets that work, and what to check before you go.
Who this is for: shoppers who want to pay a merchant with crypto through NectarPay — at the counter or online.
In this series:
Step 1 — What is NectarPay?
Step 2 — The wallet you'll need
Step 3 — Paying at the counter or online
Step 4 — After you pay
Step 5 — Mistakes and refunds
Step 6 — Where to spend
Step 2 — The wallet you'll need
What this step does: shows you the CryptoPOP wallet, how to pay with it, and the other wallets that work.
The CryptoPOP wallet
🐝 CryptoPOP wallet (app.cryptopop.org) — the wallet most NectarPay shoppers are expected to use. Here's how to pay:
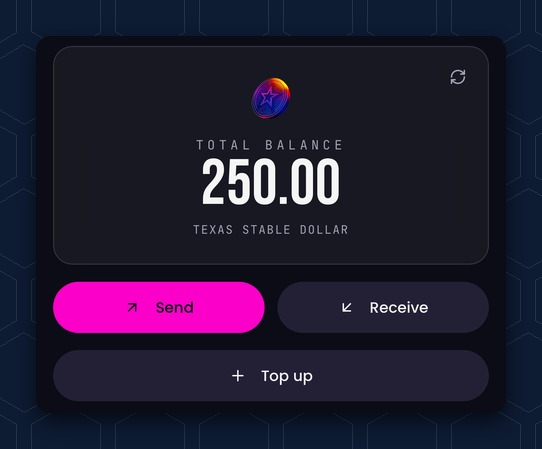
1. Tap Send on your wallet home.
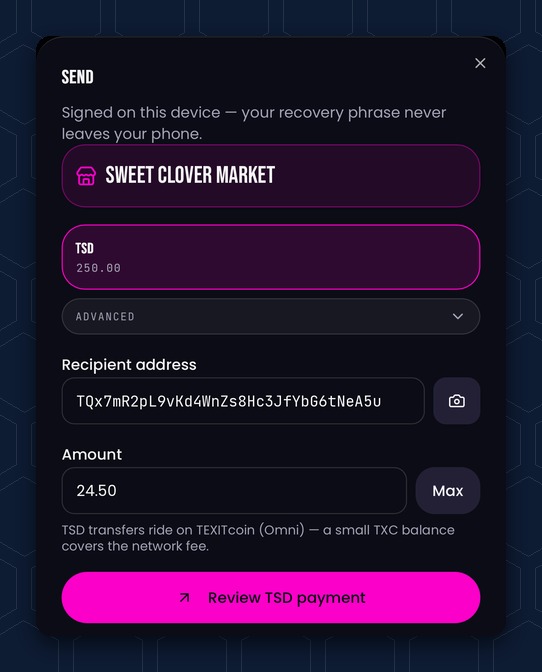
2. Tap the camera next to the address box and scan the merchant's QR. The merchant's name, address and amount fill in by themselves. Tap Review TSD payment.
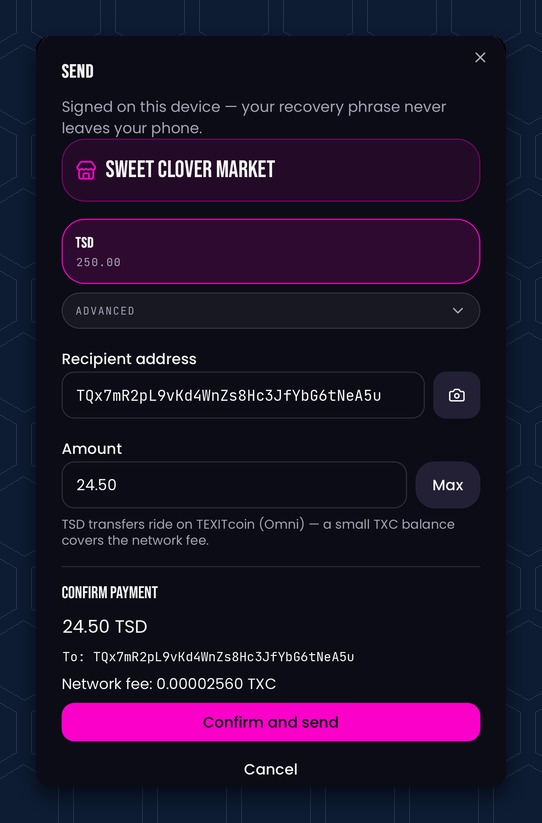
3. Check the amount, then tap Confirm and send.
⚠️ Scan from inside your wallet. Your phone's own camera app won't start a payment.
Other wallets work too
Other crypto wallets also work — some are easier than others:
🐝 Honest Money wallet
🐝 Beekeeper
🐝 Tangem
🐝 Coinbase (the app and Coinbase Wallet)
🐝 Trust Wallet
🐝 Edge
🐝 MetaMask
New to crypto wallets? Start with the Honest Money wallet tutorial.

Paying with Texas Stable Dollar (TSD)? Keep a little TEXITcoin (TXC) in the same wallet too — TSD rides on the TEXITcoin network, and the network fee is paid in TXC.
Before you go
🐝 Check you have enough of the coin you'll use, plus a little for the fee.
🐝 Know your wallet password — you'll need to open it at the counter.
🐝 Make sure your phone camera works in your wallet (it needs permission to use the camera).
Next: Step 3 — Paying at the counter or online
Questions? Buzz us — open a ticket.